
Table of Contents
ToggleA 60-inch bathroom vanity has become the go-to choice for master bathrooms and larger renovations, and for good reason. It’s wide enough to accommodate a double sink without overwhelming the space, offers substantial storage, and fits comfortably in most standard bathroom layouts. Whether you’re upgrading a tired builder-grade vanity or designing a bathroom from scratch, understanding what makes a quality 60-inch unit, and how to install it correctly, can save headaches and deliver a professional-looking result that lasts for years.
Key Takeaways
- A 60-inch bathroom vanity strikes the perfect balance between function and space, accommodating dual sinks while meeting IRC clearance requirements and fitting most master bathrooms without overwhelming the layout.
- Choose between freestanding and wall-mounted 60-inch vanities based on your design goals: freestanding is easier to install, while wall-mounted creates a modern, floating look but requires precise stud anchoring and may involve opening the wall.
- Material selection impacts durability and maintenance—solid wood and plywood with hardwood veneer offer longevity in humid bathrooms, while MDF and engineered composites are budget-friendly but less tolerant of moisture and daily wear.
- Countertop material, sink configuration, soft-close hardware, and plumbing compatibility are critical features that affect both installation ease and long-term satisfaction with your 60-inch vanity.
- Professional installation is recommended for wall-mounted units, relocated plumbing, or complex drain routing, while freestanding vanities can often be a manageable DIY project for intermediate homeowners with proper leveling and wall anchoring.
- Styling a 60-inch vanity with dual sconces, appropriately sized mirrors, coordinated hardware finishes, and smart storage solutions transforms it from a functional fixture into a polished, magazine-worthy bathroom centerpiece.
Why a 60-Inch Bathroom Vanity Is the Sweet Spot for Most Bathrooms
A 60-inch vanity strikes the perfect balance between function and footprint. It’s the narrowest standard width that comfortably supports dual undermount sinks spaced at least 30 inches apart, enough elbow room for two people to use the counter simultaneously without bumping into each other.
Most master bathrooms measure between 50 and 100 square feet, and a 60-inch vanity leaves adequate clearance on either side for proper traffic flow. The International Residential Code (IRC) recommends at least 21 inches of clearance in front of the vanity and ideally 30 inches from the center of a sink to the nearest sidewall or obstruction. A 60-inch unit fits these specs without requiring a massive room.
Storage-wise, you’re looking at anywhere from six to eight drawers or a combination of doors and drawers, depending on the design. That’s plenty of space for linens, toiletries, and cleaning supplies without resorting to freestanding cabinets that clutter the floor.
Finally, 60-inch vanities are widely available. You won’t struggle to find countertop slabs, pre-cut tops, or matching hardware. Replacement parts and compatible faucets are easier to source compared to custom or odd-sized units.
Types of 60-Inch Bathroom Vanities: Finding Your Perfect Match
Freestanding vs. Wall-Mounted Options
Freestanding vanities sit directly on the floor and are the easiest to install. They don’t require blocking in the wall studs and can be shimmed level on uneven tile. The base hides plumbing, which simplifies rough-in work and makes future repairs more accessible. But, they can make a smaller bathroom feel heavier and collect dust underneath.
Wall-mounted (floating) vanities are anchored to wall studs with a French cleat or heavy-duty brackets. They create a more modern, open feel and make floor cleaning a breeze. But installation demands precision: you’ll need to locate studs at 16 or 24 inches on center, install blocking if studs don’t align, and ensure the cabinet is perfectly level. A 60-inch cabinet filled with a stone countertop, sinks, and plumbing can weigh over 200 pounds, so anchoring into drywall alone isn’t an option. Expect to open the wall if blocking isn’t already in place.
If your bathroom has radiant floor heating or you’re tiling after the vanity install, freestanding is usually the safer bet. For contemporary designs or wet rooms with floor drains, wall-mounted offers a cleaner look and easier water management.
Material Choices: From Solid Wood to Modern Engineered Options
Solid wood (oak, maple, cherry) is durable, repairable, and holds up well in humid environments when properly sealed. It’s heavier and pricier but offers the best longevity. Look for dovetail joinery and soft-close drawer glides, hallmarks of quality construction.
Plywood with hardwood veneer is a middle-ground option. The plywood core resists warping better than particleboard, and a real wood veneer gives a premium look at a lower cost. Confirm the interior is also plywood, not MDF, especially in bathrooms prone to moisture.
MDF (medium-density fiberboard) is budget-friendly and takes paint beautifully, making it popular for painted finishes. It’s less tolerant of water damage, though. If you go this route, make sure all edges are sealed and avoid MDF in homes with poor bathroom ventilation. Many bathroom remodel projects now favor engineered materials for painted styles due to smoother finishes and lower cost.
Engineered wood composites like thermofoil or laminate over particleboard are the most affordable. They’re fine for guest baths with light use, but don’t expect them to survive a leak or years of daily wear in a family bathroom.
Top Features to Look for When Shopping for a 60-Inch Vanity
Start with the countertop material. Common choices include:
- Quartz: Non-porous, stain-resistant, and doesn’t require sealing. Expect to pay $60–$100 per square foot installed.
- Granite: Natural stone with unique patterns. Needs periodic sealing but handles heat and scratches well. Around $50–$80 per square foot.
- Marble: Luxurious but porous and prone to etching from acidic products. Best for low-traffic powder rooms or design-forward homeowners willing to maintain it.
- Cultured marble or solid surface: Budget-friendly and seamless with integrated sinks, but scratches more easily. Runs $40–$60 per square foot.
Next, check sink configuration. Undermount sinks give a sleaner look and make countertop cleanup easier, but require a waterproof countertop material. Integrated sinks (molded into the counter) eliminate seams but can’t be replaced separately. Drop-in (overmount) sinks are the easiest to install and replace, though they interrupt the counter line.
Drawer and door hardware matters more than most people think. Soft-close hinges and full-extension drawer glides add $50–$100 to the cost but eliminate slamming and make accessing the back of deep drawers easier. Dovetail or mortise-and-tenon joinery in drawers will outlast stapled or glued construction.
Look for a toe kick recess of at least 3 inches deep and 4 inches tall. This lets you stand close to the sink without stubbing your toes and makes the vanity feel more integrated.
Finally, confirm the plumbing compatibility. Most 60-inch vanities have a center divider or support panel that complicates drain and supply line routing. Some units have a removable or open back, while others require precise drilling. If you’re reusing existing plumbing, measure the drain and supply locations before ordering. Adapting plumbing to fit a new vanity is easier than modifying a cabinet on-site.
Many homeowners browse design galleries to compare finishes and hardware styles before committing to a purchase.
Installation Considerations: DIY or Professional Help?
Installing a freestanding 60-inch vanity is within reach for most intermediate DIYers. You’ll need a level, stud finder, adjustable wrench, basin wrench, PVC saw or tubing cutter, silicone caulk, and shims. The cabinet itself can usually be maneuvered by two people, though a countertop slab may require three.
Key steps include:
- Shut off water at the angle stops and disconnect old supply lines and P-trap.
- Remove the old vanity and inspect the wall for water damage or mold. Repair and prime any damaged drywall before proceeding.
- Mark stud locations if you’re securing the vanity to the wall (recommended even for freestanding units to prevent tipping).
- Level and shim the cabinet. An unlevel vanity will cause the doors to swing open or prevent drawers from closing properly.
- Attach to studs with 3-inch cabinet screws through the back rail.
- Install the countertop, applying a bead of silicone along the top edge of the cabinet.
- Reconnect plumbing, using new supply lines and P-trap if the old ones are corroded. Check for leaks before finishing.
- Caulk the seams where the countertop meets the wall and around sink edges if undermount.
Wall-mounted vanities are trickier. You’ll need to install blocking between studs, typically two horizontal 2x6s or 2x8s spanning at least three studs to distribute the load. This usually means opening the drywall, which then requires patching, mudding, and repainting. If your wall is tiled, you’re looking at tile removal and reinstallation, which pushes the project into professional territory for most DIYers.
You’ll also need to rough in plumbing before hanging the cabinet, as there’s no toe kick to hide exposed pipes. A furniture-style leg kit or cabinet feet can split the difference, giving a floating look while resting some weight on the floor.
When to call a pro: If you’re relocating plumbing, running new electrical for outlets, or dealing with cast-iron drain stacks, hire a licensed plumber and electrician. Most jurisdictions require permits for these changes, and improper work can lead to leaks, mold, or code violations that complicate future home sales. A full vanity swap on existing plumbing typically costs $300–$600 in labor, depending on your region.
Styling Your 60-Inch Vanity for Maximum Impact
Once your vanity is installed, styling can elevate the space from functional to finished.
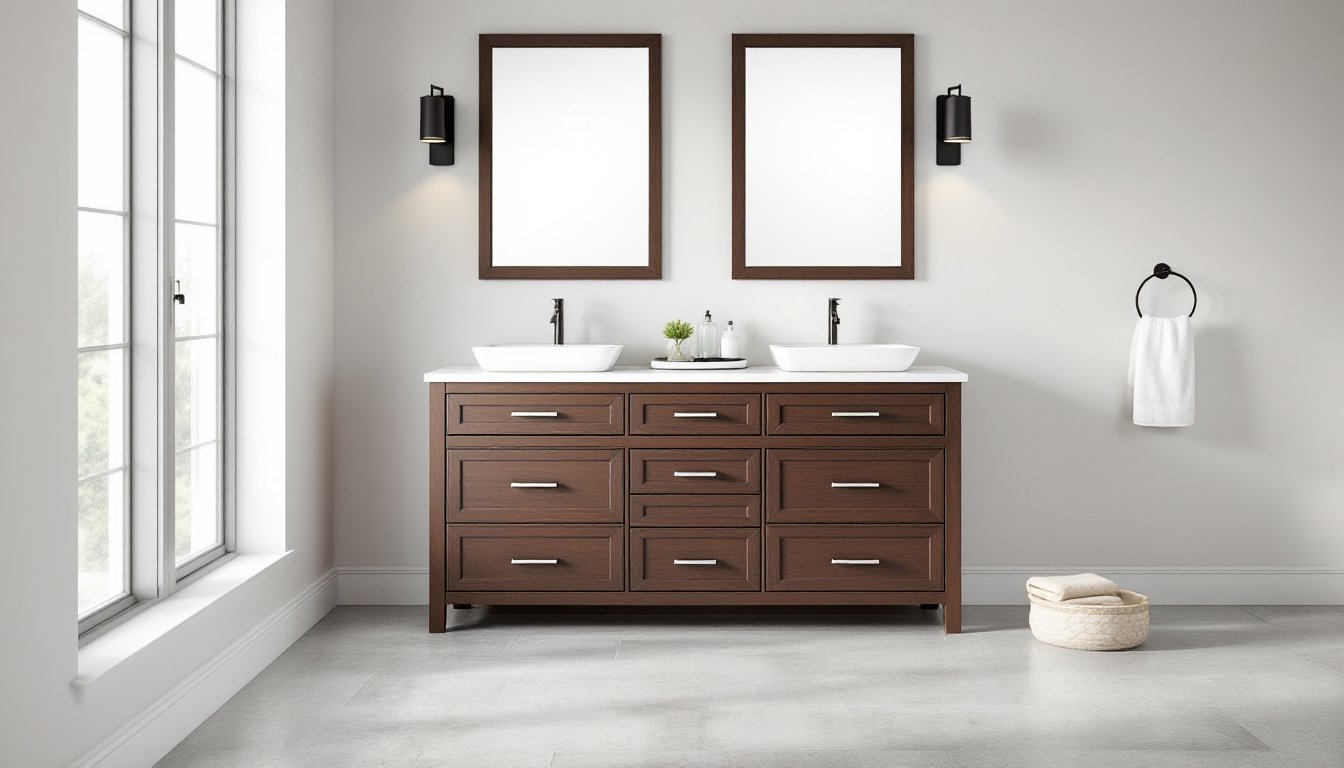
Lighting is critical. A 60-inch vanity benefits from two wall-mounted sconces flanking the mirror, placed about 36–40 inches apart and roughly 60–65 inches off the floor (adjust based on user height). This eliminates shadows on the face better than a single overhead fixture. If you prefer a linear vanity light, choose one that’s at least 36 inches wide to provide even coverage across both sinks.
Mirrors can be a single large piece (54–58 inches wide to leave a small margin on each side) or two separate mirrors, each about 24–28 inches wide, centered over the sinks. Framed mirrors add warmth: frameless or beveled mirrors keep the look minimal. If your ceilings are 9 feet or higher, consider a vertical mirror that extends closer to the ceiling to visually lift the room.
Faucets should match the vanity finish and sink type. Widespread faucets (with separate hot and cold handles) require three holes and offer a traditional look. Single-handle faucets are easier to operate with soapy hands and work in single-hole or 4-inch centerset configurations. For a modern aesthetic, wall-mounted faucets free up counter space but require in-wall plumbing, another job best left to a plumber unless you’re comfortable with PEX or copper sweating.
Hardware and accessories tie the room together. Drawer pulls, towel bars, and toilet paper holders should coordinate in finish (brushed nickel, matte black, polished chrome). Don’t mix more than two metal finishes in a small space or it starts to look chaotic.
Keep countertop clutter to a minimum. A tray or small organizer corrals daily-use items like soap, lotion, and toothbrush holders. Decorative elements, a small plant, a candle, or a framed print, add personality without sacrificing function. For more curated styling ideas, many homeowners look to design blogs for layouts that balance beauty and everyday use.
Finally, use the cabinet interior wisely. Drawer dividers, pull-out trays, and door-mounted organizers maximize storage and keep toiletries from becoming a jumbled mess. Measure the interior dimensions before buying organizers: many vanities have a center support that reduces usable width in the middle drawers.