
Table of Contents
ToggleChoosing the right range hood isn’t just about aesthetics, it’s about protecting your kitchen from grease buildup, smoke, and lingering odors. A 42 inch range hood is designed to cover ranges or cooktops in the 36 to 42 inch width bracket, making it one of the most common sizes for residential kitchens. Whether someone’s replacing an outdated unit or installing one for the first time, understanding the options, features, and installation requirements can save headaches and money. This guide breaks down everything needed to pick and install the right 42 inch range hood.
Key Takeaways
- A 42 inch range hood is the industry standard for residential kitchens with 36-inch ranges, providing optimal 3-6 inch overhang for effective smoke and grease capture.
- CFM rating is critical: gas ranges need 100 CFM per 10,000 BTU of output, so most residential models require 400-600 CFM for adequate ventilation power.
- Wall-mounted hoods are more affordable and easier to install than island models, while ducted configurations are always more effective than recirculating hoods at removing heat and moisture.
- Proper 42 inch range hood installation requires mounting to wall studs 24-36 inches above the cooking surface, using rigid metal ductwork and a dedicated electrical circuit for safety and performance.
- Key features to prioritize include baffle filters (dishwasher-safe), dimmable LED lighting, four-speed controls, and commercial-grade stainless steel construction for durability and ease of maintenance.
Why a 42 Inch Range Hood Is the Perfect Fit for Your Kitchen
A 42 inch range hood matches perfectly with standard 36 inch cooktops and ranges, providing the recommended 3 to 6 inch overhang on each side for optimal smoke and grease capture. This overhang matters, undersized hoods let steam and cooking byproducts escape into the kitchen, coating cabinets and walls with grease film over time.
Most residential kitchens are built around 30 or 36 inch ranges. The 42 inch hood width has become an industry standard because it balances coverage, ventilation power, and cabinet space without dominating the room. It fits neatly into the typical 12 to 18 inch clearance zone between the cooktop surface and the bottom of upper cabinets, as recommended by the International Residential Code (IRC).
For homes with gas ranges, adequate ventilation isn’t optional, it’s a safety and air quality issue. Gas combustion releases nitrogen dioxide, carbon monoxide, and moisture. A properly sized hood exhausts these byproducts outdoors (in ducted configurations) or filters them (in recirculating setups). The 42 inch width provides enough intake area to handle the output from four to six burners, including high-BTU burners common on modern ranges.
Types of 42 Inch Range Hoods: Finding Your Ideal Match
Range hoods come in several mounting styles, each suited to different kitchen layouts and ventilation needs. Picking the wrong type can mean costly rework or poor performance.
Wall-Mounted vs. Island Range Hoods
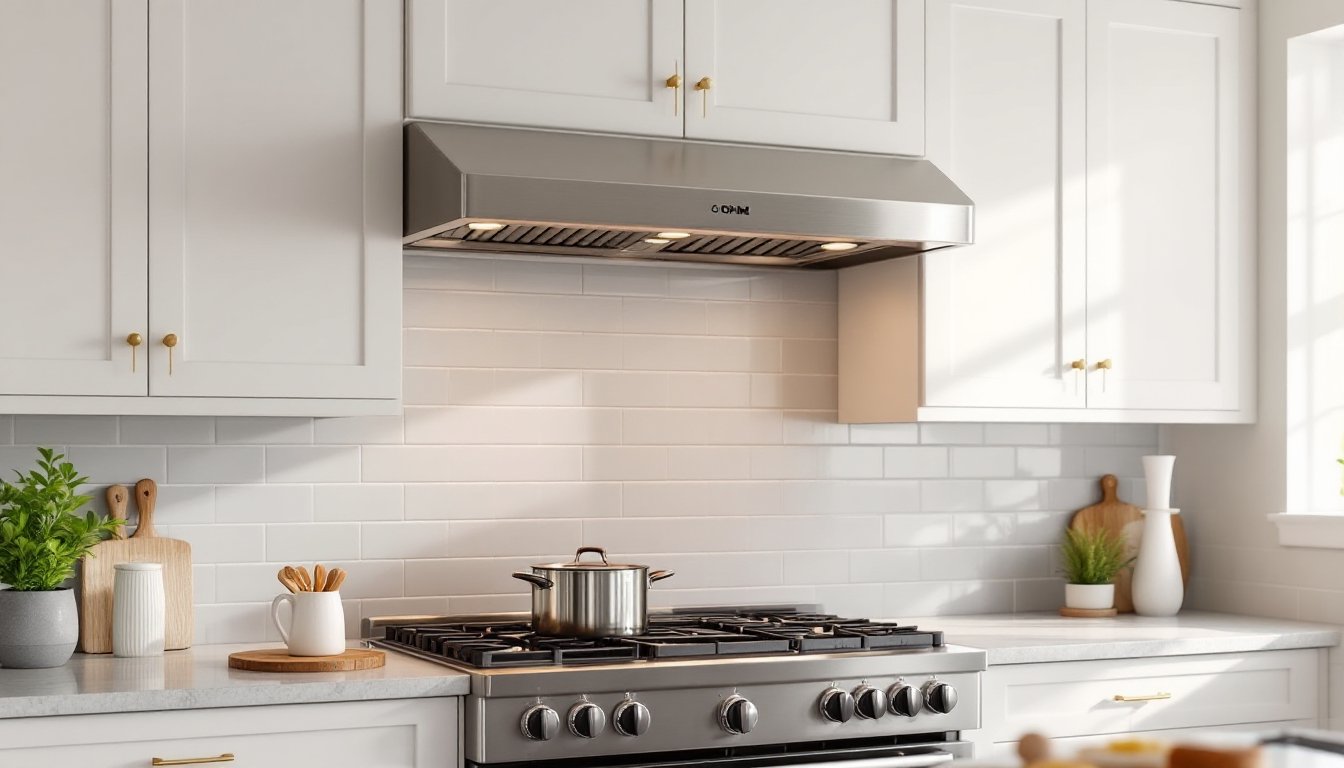
Wall-mounted (or chimney-style) hoods attach to the wall above the range, with a duct chase or decorative chimney extending to the ceiling. They’re the most common choice for ranges positioned against a wall. Installation is straightforward: mount the hood to wall studs, connect ductwork through the wall or up through the ceiling, and wire to a dedicated circuit. Wall-mounted units often cost less than island models and offer a wide range of styles, from stainless steel industrial to glass-paneled contemporary.
Island range hoods suspend from the ceiling above a cooktop in an island or peninsula layout. They require ceiling joists capable of supporting the hood’s weight (typically 50 to 100 pounds) plus ductwork. Because they’re visible from all sides, island hoods tend to be pricier and more design-focused. They also need higher CFM ratings (covered below) since they lack a wall to help direct airflow. Ductwork runs up into the ceiling and out through the roof or a sidewall, which can complicate installation in homes with complex framing or finished ceilings.
Under-cabinet hoods mount to the bottom of a wall cabinet. While they save space and cost, they’re less common in 42 inch widths, most under-cabinet models top out at 36 inches. They work for lighter cooking but struggle with high-heat or frequent use.
Insert (or built-in) hoods fit inside a custom cabinet enclosure. They offer a seamless look but require custom cabinetry, adding to project cost and complexity.
Key Features to Look for in a 42 Inch Range Hood
Not all 42 inch hoods perform equally. Focusing on a few core specs ensures the unit handles the kitchen’s actual cooking demands.
CFM Rating and Ventilation Power
CFM (cubic feet per minute) measures how much air the hood moves. The rule of thumb: gas ranges need 100 CFM per 10,000 BTU of burner output. A typical residential gas range with four burners totaling 40,000 to 60,000 BTU requires 400 to 600 CFM. Electric ranges can get by with lower CFM, around 150 to 300, but higher is better for searing, wok cooking, or anything that generates heavy smoke.
Ducted hoods exhaust air outside and are always more effective than recirculating (ductless) models, which rely on charcoal filters to scrub the air before returning it to the kitchen. Recirculating hoods can’t remove heat or moisture, only odors and some grease. If ductwork is feasible, go ducted.
Noise level is the tradeoff for power. CFM and sones (a unit of perceived loudness) go hand in hand. A hood rated at 600 CFM will likely hit 6 to 8 sones at full speed, about as loud as normal conversation or a dishwasher. Multi-speed controls let users dial down the fan when simmering and crank it up when searing steaks. Homeowners using kitchen ventilation regularly appreciate hoods with four-speed settings for flexibility.
Lighting is underrated. Integrated LED task lighting illuminates the cooktop without needing separate fixtures. Look for hoods with dimmable LEDs rated for at least 200 lumens per bulb.
Filter type matters for maintenance. Baffle filters (stainless steel slats) are dishwasher-safe and long-lasting, making them the best choice for frequent cooking. Mesh filters clog faster and need replacement every few months. Charcoal filters in recirculating hoods should be swapped every three to six months depending on use.
Material and finish: Stainless steel is durable and easy to clean but shows fingerprints. Powder-coated steel or glass panels resist smudging. Avoid thin-gauge steel, it dents easily and rattles when the fan runs.
Top 42 Inch Range Hood Models Worth Considering in 2026
The market offers dozens of 42 inch hoods, but a few stand out for reliability, performance, and value.
Broan-NuTone E60000 Series is a wall-mounted chimney hood with 600 CFM, four-speed electronic controls, and dishwasher-safe baffle filters. It’s ducted-only (no recirculating option) and runs quieter than many competitors at around 6 sones on high. The stainless finish is commercial-grade 430 stainless, thicker than budget models. Retail price hovers around $600 to $750 depending on the finish.
Cosmo COS-668AS750 is a popular mid-range option with 750 CFM, making it well-suited for high-output gas ranges. It includes three-speed touch controls, dual LED lighting, and a permanent mesh filter. The noise level is higher, around 8 sones, but the extra airflow compensates. Expect to pay $400 to $550. According to reviews from appliance testing labs, this model handles grease capture well but requires monthly filter cleaning.
Zephyr Titan Series (island model) delivers 600 CFM in a sleek, low-profile design. It features a DC motor (quieter and more efficient than AC motors), gesture control (wave a hand to adjust fan speed), and built-in Bluetooth speakers. It’s pricey, $1,200 to $1,500, but offers premium build quality and a 10-year motor warranty.
FOTILE JQG7501 is a recirculating option for kitchens where ductwork isn’t possible. It uses a multi-stage filtration system (mesh, charcoal, and HEPA-style) and claims 99% grease capture. CFM is lower at 450, but it’s whisper-quiet at 3 sones. Cost runs $900 to $1,100.
When comparing models, check the blower location. Internal blowers (inside the hood) are standard and easier to install. External (or remote) blowers mount in the attic or outside, drastically reducing kitchen noise but adding installation complexity and cost.
Installation Tips for Your 42 Inch Range Hood
Installing a range hood is an intermediate DIY project. It requires basic carpentry, electrical, and (for ducted models) ductwork skills. Most jurisdictions require a permit for new ductwork or electrical circuits, so check local codes before starting.
Step 1: Measure and mark the mounting height. The IRC recommends 24 to 30 inches above an electric cooktop and 30 to 36 inches above a gas range. Measure from the cooking surface, not the floor. Mark the centerline of the range on the wall, then use a level to mark the hood’s mounting bracket location.
Step 2: Locate wall studs. Use a stud finder to locate at least two studs within the hood’s mounting width. Most hoods weigh 30 to 60 pounds and must be lag-bolted into studs, drywall anchors won’t cut it.
Step 3: Install ductwork (if ducted). For wall-mounted hoods, ductwork typically runs straight back through the wall or up through the ceiling. Use rigid metal duct (galvanized steel or aluminum) rather than flexible duct, it reduces airflow resistance and grease buildup. The IRC and International Mechanical Code (IMC) require smooth-walled metal duct for grease-laden exhaust. Keep duct runs short and minimize elbows: every 90-degree turn reduces effective CFM by about 10%. Guidance from home maintenance pros emphasizes securing all duct joints with metal foil tape (not cloth “duct tape”) and sealing them to prevent backdrafts.
Step 4: Run electrical. Range hoods require a dedicated 120V circuit. If one isn’t present, hire a licensed electrician or pull a permit and install one per NEC Article 422 (appliance circuits). Most hoods use a standard three-prong plug, but some require hardwiring. Turn off power at the breaker before making connections.
Step 5: Mount the hood. Attach the mounting bracket to the wall studs with 3-inch lag screws. Lift the hood onto the bracket (recruit a helper, these are awkward and heavy). Secure the hood with the provided screws, then connect the ductwork and electrical.
Step 6: Test airflow and seal gaps. Turn on the hood and check that air exhausts outside (for ducted models). Hold a tissue near the intake, it should be pulled toward the hood. Seal any gaps between the hood and wall or ceiling with silicone caulk.
Safety notes: Wear safety goggles when drilling into walls or ceilings (drywall dust, metal shavings). Use a dust mask if cutting into plaster or older materials that may contain asbestos. If the existing ductwork is flex duct or undersized (less than 6 inches diameter for 600+ CFM), replace it, undersized ducts cause back pressure, reduce performance, and can overheat the motor.
For island installations, ensure ceiling joists can handle the load. If in doubt, sister a joist or add blocking between joists. This is structural work, if it’s beyond comfort level, hire a contractor.