
Table of Contents
ToggleReplacing old windows with new Andersen units can transform your home’s energy efficiency, curb appeal, and comfort. Whether you’re dealing with drafty originals, condensation between panes, or rotting frames, a window replacement project delivers measurable returns. But the process involves more than picking a style from a catalog. You’ll need to choose between replacement methods, measure accurately, and decide whether to tackle installation yourself or hire a pro. This guide walks homeowners through every stage of an Andersen window replacement project, from evaluating your current windows to budgeting and installation strategies.
Key Takeaways
- Andersen window replacement can cut heat loss by up to 50% in cold climates by upgrading from single-pane to dual-pane low-E windows, making it the top energy efficiency investment for homeowners.
- Choose between full-frame replacement for damaged or out-of-square frames and insert replacement for faster, less invasive upgrades when existing frames are solid and rot-free.
- Accurate measurements are critical for Andersen window replacement—measure rough openings at three points and subtract appropriate clearances to avoid costly ordering mistakes.
- Insert replacement is the more DIY-friendly option and can be completed in 2–4 hours per window, while full-frame replacement requires carpentry expertise and should typically be handled by professionals to prevent water intrusion issues.
- Andersen window replacement costs range from $400–$1,200 per window installed, with material prices varying by series (100 Series at $250–$500 to A-Series at $700–$1,500+), and professional installation adding $100–$400 per window.
- Proper flashing installation and low-expansion foam application are essential to prevent leaks and structural damage—order windows 4–8 weeks in advance and acclimate them for 24 hours before installation for optimal performance.
Why Replace Your Andersen Windows?
Most homeowners consider window replacement when energy bills climb, condensation appears between panes, or frames show visible damage. These aren’t just cosmetic issues, they signal failing seals, compromised insulation, or structural deterioration.
Energy efficiency is the leading driver. Older single-pane windows or early double-pane units without low-E coatings can account for 25–30% of heating and cooling loss. Modern Andersen replacement windows feature Low-E4 glass, argon or krypton gas fills, and insulated frames that dramatically reduce thermal transfer. In cold climates, upgrading from single-pane to dual-pane low-E windows can cut heat loss by up to 50%.
Condensation between panes means the seal has failed and the insulating gas has escaped. Once this happens, the window’s R-value drops, and moisture stains the glass permanently. This is a clear sign it’s time to replace, not repair.
Operational problems, sticking sashes, broken locks, or hard-to-open casements, often stem from warped frames or worn hardware. While some parts can be replaced, if the frame is compromised, a full replacement makes more sense than patching.
Curb appeal and resale value matter too. New windows are among the top improvements noticed by buyers. According to national home improvement cost guides, window replacement recoups 70–80% of its cost at resale, depending on material and market conditions.
Understanding Your Andersen Window Replacement Options
Andersen offers two main replacement pathways: full-frame replacement and insert (or pocket) replacement. The right choice depends on the condition of your existing frames, wall type, and whether you’re doing interior trim work.
Full-Frame vs. Insert Replacement
Full-frame replacement removes the entire window unit, sash, jambs, and exterior trim, down to the rough opening in the wall. This method is necessary when frames are rotted, out of square, or when you’re changing window size or style. It allows installers to inspect and repair framing, add insulation, and install new flashing for a watertight seal. Full-frame is the go-to for older homes, gut renovations, or when siding is being replaced. Expect more labor, interior and exterior trim work, and potential drywall patching.
Andersen’s 400 Series Woodwright and A-Series windows are commonly used for full-frame jobs. These units include a complete nailing fin for new-construction-style installation into the rough opening.
Insert replacement (also called pocket or retrofit replacement) fits a new window into the existing frame. The old sash and hardware are removed, but the jambs and exterior trim stay in place. This method is faster, less invasive, and avoids exterior siding work. It’s ideal when frames are square, solid, and rot-free. The trade-off: you lose some glass area because the new frame sits inside the old one, typically reducing the viewable opening by 1–2 inches per side.
Andersen’s 100 Series and select 400 Series models are designed specifically for insert applications. These units have mounting flanges that attach to the interior of the existing wood jambs.
Choose full-frame if there’s any rot, structural issues, or if you’re renovating. Choose insert replacement for speed and minimal disruption when frames are in good shape.
How to Measure for Andersen Window Replacement
Accurate measurements prevent costly ordering mistakes. Andersen windows are built to order, so there’s little room for error. You’ll measure differently depending on whether you’re doing a full-frame or insert replacement.
For full-frame replacement, measure the rough opening, the framed opening in the wall after removing the old window and trim. Measure width and height at three points (left, center, right for width: top, middle, bottom for height) and use the smallest measurement. Rough openings should be about 1/2 inch wider and taller than the window unit to allow for shimming and leveling. Andersen provides rough opening dimensions for each window model in their specification sheets.
For insert replacement, measure the existing frame opening. With the old sash removed, measure from jamb to jamb (width) and from sill to head jamb (height) at three points each. Again, use the smallest dimension. Subtract 1/4 inch from width and height to allow for installation clearance and squaring.
Check that openings are square by measuring diagonals, they should match within 1/4 inch. If they don’t, the frame is out of square, and you may need shimming or, in severe cases, a full-frame replacement.
Measure from the interior unless you’re removing exterior trim. Record measurements in inches and fractions (not decimals) to match standard window sizing. Double-check everything before ordering.
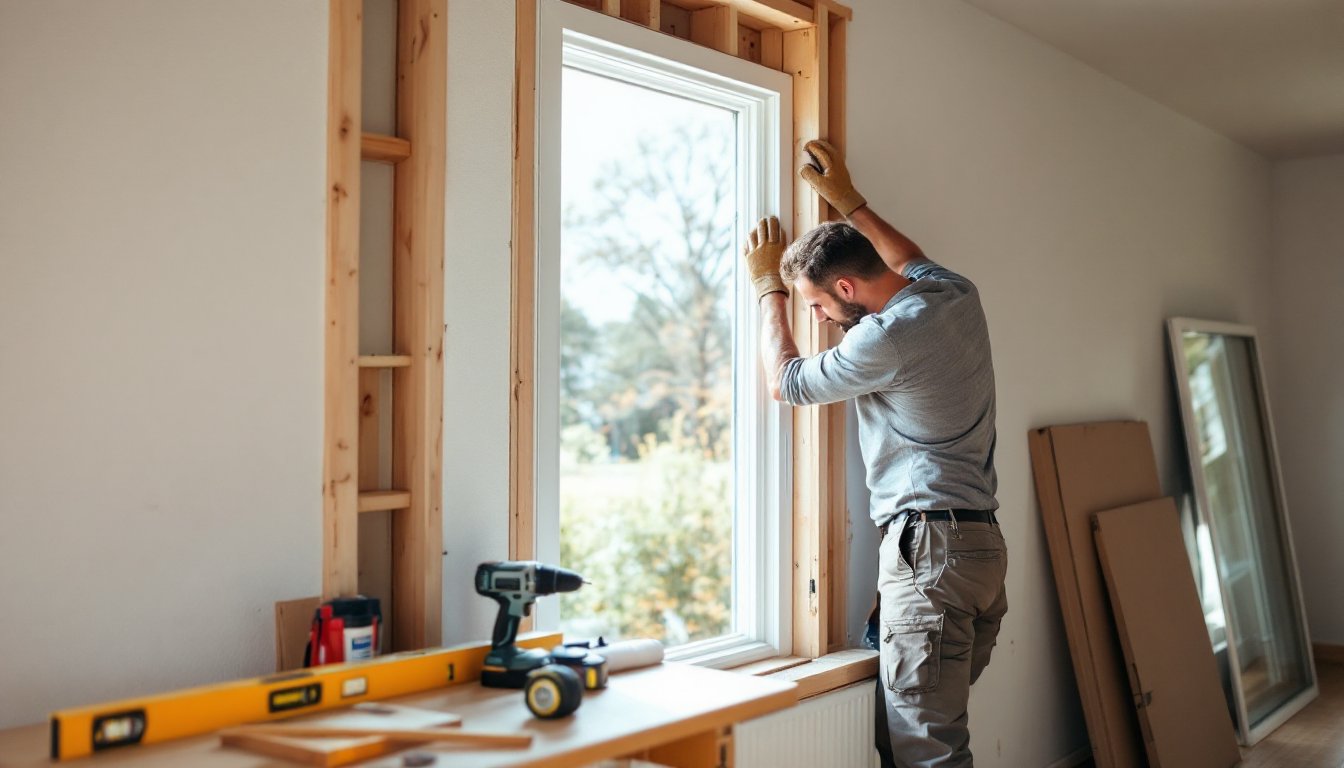
DIY vs. Professional Installation: What You Need to Know
Installing Andersen replacement windows is within reach for experienced DIYers, but it’s not a beginner project. Success depends on the replacement type, your skill level, and your comfort working with levels, shims, and flashing.
Insert replacement is the more DIY-friendly option. The process involves removing the old sash, cleaning the frame, setting the new unit, shimming it level and plumb, fastening it with screws through pre-drilled holes, insulating gaps with low-expansion foam, and applying interior trim or casing. You’ll need a drill, level, tape measure, utility knife, pry bar, and caulk gun. A second person helps when handling larger units. Most inserts can be completed in 2–4 hours per window once you’ve done the first one.
Full-frame replacement is more involved. It requires removing interior and exterior trim, cutting out the old window, inspecting and repairing framing, installing new flashing and a sill pan, setting and leveling the new unit, insulating, and re-trimming both sides. You may also need to patch drywall and touch up siding. This is a full-day job per window and demands carpentry skills, especially around flashing details that prevent water intrusion. Mistakes here can lead to leaks, mold, and structural damage.
When to hire a pro:
- If you’re doing full-frame replacement and lack carpentry experience
- If the home has brick, stone, or stucco exterior (removing and sealing these materials is tricky)
- If framing is damaged or the opening isn’t square
- If a building permit is required (many jurisdictions require permits for window replacement, and inspections are easier with a licensed contractor)
- If you’re replacing multiple windows and want efficiency and warranty protection
Many contractors on Angi offer free quotes and can provide references for similar jobs. Professional installation typically costs $100–$300 per window for labor, depending on region and complexity, according to industry averages.
Cost Breakdown: What to Expect for Andersen Window Replacement
Andersen window replacement costs vary widely based on window series, size, style, glass package, and whether you DIY or hire out.
Material costs (window unit only):
- 100 Series: $250–$500 per window (vinyl, insert replacement)
- 400 Series: $450–$900 per window (wood interior, vinyl or Fibrex exterior, full-frame or insert)
- A-Series: $700–$1,500+ per window (all-wood, premium hardware, custom colors)
Add $50–$150 per window for upgrades like SmartSun glass, tempered glass (required for certain locations per IRC), or decorative grilles.
Installation costs (if hiring a pro):
- Insert replacement: $100–$200 per window
- Full-frame replacement: $200–$400 per window
Full projects including materials, labor, and disposal typically range from $400–$1,200 per window for standard double-hung or casement units. Larger windows (bays, bows, picture windows) can run $1,500–$3,000+ each.
DIY cost savings: Doing insert replacements yourself cuts labor costs entirely. For a typical home with 10 windows, that’s $1,000–$2,000 saved. Full-frame DIY is riskier, if you make mistakes with flashing or framing, repair costs can erase your savings.
Additional expenses to budget for:
- Permits: $50–$200 (varies by jurisdiction: check local building department)
- Trim and casing materials: $20–$60 per window
- Flashing tape, sealants, insulation: $50–$100 total
- Tool rental (if needed): $30–$80/day for specialty tools
Material costs fluctuate with lumber and vinyl markets. Get updated quotes from local suppliers or home improvement estimators on HomeAdvisor to refine your budget.
Tips for a Successful Andersen Window Replacement Project
Planning and prep work separate smooth installations from frustrating ones. Follow these strategies to avoid common pitfalls.
Order windows early. Andersen builds most replacement windows to order, with lead times of 4–8 weeks depending on series and customization. Measure, finalize specs, and order before you start demo.
Inspect framing before committing to insert replacement. Pop off a piece of interior trim and check the jambs for rot, water stains, or insect damage. If you find issues, switch to full-frame. Trying to save time with an insert when the frame is compromised leads to callbacks and wasted money.
Use proper flashing. For full-frame replacements, install a sill pan (a pre-formed plastic or rubberized pan that sits under the window) and seal it with flashing tape that laps onto the house wrap or building paper. This creates a drainage plane that directs water out, not into the wall. Follow Andersen’s installation instructions and local building code, this is where most DIY leaks occur.
Don’t over-insulate. Use low-expansion foam around windows. High-expansion foam can bow the jambs and prevent the sash from operating smoothly. Fill gaps to about 50–70% full, let it cure, then trim flush.
Check operation before final trim. Open and close each sash several times before caulking or installing trim. Make sure locks engage and the window operates smoothly. It’s much easier to adjust shims now than after trim is nailed in.
Wear PPE. Safety glasses protect against flying glass shards and debris. Work gloves prevent cuts when handling old windows. A dust mask is essential when cutting or removing old wood trim, especially in homes built before 1978 (lead paint hazard).
Acclimate windows. Let new windows sit in the room where they’ll be installed for 24 hours before installation, especially in extreme temperatures. This prevents warping or expansion issues.
Following manufacturer instructions, local codes, and these field-tested tips will help ensure your Andersen replacement windows perform well for decades.