Table of Contents
ToggleIndoor air quality isn’t just about comfort, it’s about health. Aroeve air purifiers have gained traction among homeowners for their affordability and effectiveness at tackling dust, pollen, pet dander, and odors. But like any filtration system, these units are only as good as the filters inside them. A clogged or outdated filter won’t just reduce performance: it can circulate trapped particles back into your living space. Whether you’re dealing with seasonal allergies, pet hair, or just want cleaner air in your workshop, understanding how Aroeve filters work, and when to swap them out, keeps your system running efficiently and your air genuinely clean.
Key Takeaways
- Aroeve air purifier filters use multi-layer HEPA filtration with 99.97% efficiency to capture particles as small as 0.3 microns, combining a pre-filter, true HEPA layer, and activated carbon in one replaceable cartridge.
- Replace your Aroeve air purifier filter every 3–6 months under normal conditions, sooner if you have pets, smoke, or high dust exposure, and watch for discoloration, odor loss, or airflow reduction as replacement signals.
- Always match the correct Aroeve model number (MK01, MK04, MK06, MK08) to your replacement filter, verify the part number on your current filter, and avoid generic ‘universal HEPA’ filters that can cause air bypass and reduced performance.
- Replace your filter immediately if the indicator light stays red after reset, visible mold appears, air quality worsens despite the unit running, or unusual noises develop to prevent motor damage and maintain efficiency.
- Maximize Aroeve filter lifespan by running lower speeds during low-activity hours, pre-vacuuming high-traffic areas, keeping the unit elevated 12–18 inches off the floor, and cleaning exterior vents monthly.
- OEM Aroeve filters typically cost $15–$25 per unit, while third-party alternatives range from $10–$15, but verify true HEPA H13 specifications and read recent reviews to avoid inconsistent quality or fitment issues.
What Makes Aroeve Air Purifier Filters Different?
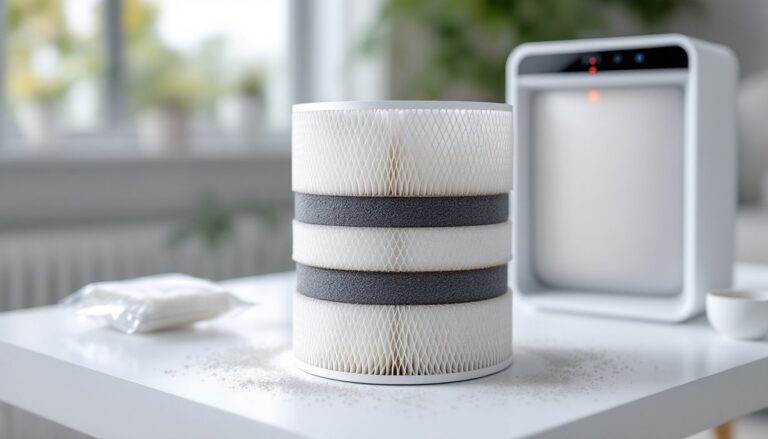
Aroeve filters use a multi-layer HEPA filtration system, typically combining a pre-filter, a true HEPA layer, and an activated carbon layer in a single cartridge. This design tackles particles as small as 0.3 microns with up to 99.97% efficiency, covering everything from mold spores to smoke.
The pre-filter catches larger debris like hair and lint, extending the life of the HEPA core. The activated carbon layer neutralizes household odors, VOCs (volatile organic compounds), and cooking smells. Unlike some purifiers that separate these components, Aroever integrates them into one replaceable unit, which simplifies maintenance but means you’re swapping the entire cartridge at once.
Most Aroeve models use a cylindrical filter design that fits around the unit’s central airflow column. This 360-degree intake pattern pulls air from all sides, improving circulation in small to mid-sized rooms (typically 100–400 square feet, depending on the model). The trade-off? Filter longevity depends heavily on air quality and runtime. If you’re running the unit 24/7 in a high-traffic area or during wildfire season, expect shorter replacement intervals.
One practical advantage: Aroeve filters are non-proprietary in design, meaning third-party replacements are widely available. Just confirm the part number matches your specific model (MK01, MK04, MK06, etc.) to avoid fitment issues.
Understanding Filter Types and Replacement Schedules
Aroeve uses true HEPA filters, not HEPA-type or HEPA-like alternatives. True HEPA meets the DOE standard for particle capture, which matters if you’re dealing with allergens or respiratory sensitivities. Some budget purifiers use lower-grade filters that don’t hit that 99.97% threshold.
Replacement schedules depend on usage and environment. Aroeve recommends filter changes every 3–6 months under normal conditions. Run the unit in a home with pets, smokers, or during construction work, and you’re looking at the shorter end of that range. Most models include a filter replacement indicator light, usually red, that activates based on runtime hours, not actual filter condition. Treat it as a guideline, not gospel.
Visual inspection helps. Pull the filter monthly and check for:
- Discoloration: A white or light-gray filter turning dark gray or brown signals saturation.
- Odor: If the carbon layer smells musty or fails to neutralize cooking odors, it’s spent.
- Airflow drop: If the unit runs louder or the room takes longer to clear, the filter may be clogged.
Some users try vacuuming the pre-filter layer to extend life. This works temporarily for surface dust but won’t restore HEPA or carbon performance. Once the inner layers are saturated, replacement is the only fix.
When to Replace Your Aroeve Filter
Replace the filter immediately if:
- The indicator light stays red after resetting (usually a 3–5 second button hold).
- Visible mold or moisture appears on the filter surface, this can happen in humid basements or bathrooms.
- Air quality worsens even though the unit running. If allergies flare up or dust accumulates faster, the filter isn’t doing its job.
- Unusual noises develop. A rattling or whistling sound can mean the filter is seated incorrectly or damaged.
Don’t wait for a total breakdown. A compromised filter forces the motor to work harder, shortening the unit’s overall lifespan. Budget $20–$40 per replacement and mark your calendar. Four changes per year (every 90 days) is a safe baseline for high-use households.
How to Replace Your Aroeve Air Purifier Filter: Step-by-Step
This is a 5-minute job that requires no tools. Here’s the process:
- Power off and unplug the unit. Don’t skip this, some models have capacitors that hold a charge briefly.
- Remove the front or bottom cover. Most Aroeve units use a twist-lock or snap-fit cover. Rotate counterclockwise about 30 degrees or press the release tabs on the sides.
- Pull out the old filter. Grip the plastic ring or tab at the top. If it’s stuck, gently wiggle it free, avoid yanking, which can damage the housing.
- Unwrap the new filter. Peel off the plastic wrap completely. Filters ship sealed to preserve the activated carbon: leaving wrap on will block airflow and can damage the motor.
- Check for a protective plastic layer inside the filter. Some models include a thin inner wrap. Remove it if present.
- Insert the new filter. Align the arrow or tab on the filter with the corresponding mark inside the unit. Push down firmly until it seats flush.
- Replace the cover. Twist or snap it back into place. You should hear or feel a click.
- Plug in and reset the filter indicator. Hold the filter reset button (often marked with a circular arrow icon) for 3–5 seconds until the red light turns off.
Safety note: Dispose of used filters in a sealed plastic bag. HEPA filters trap allergens, mold, and potentially harmful particles, shaking them out indoors defeats the purpose of the purifier.
If the unit won’t power on after replacement, double-check that the cover is fully seated. Many models include a safety interlock that prevents operation if the cover isn’t locked.
Choosing the Right Replacement Filter for Your Model
Aroeve manufactures several purifier models, MK01, MK04, MK06, and MK08 are the most common. Filters are not universally compatible, even though they look similar. Always verify the model number on the bottom or back of your unit before ordering.
The MK04 and MK06 share the same filter size but may have different carbon layer densities depending on production year. When in doubt, cross-reference the part number printed on your current filter. It usually appears as a white label on the filter’s plastic frame.
Third-party filters are widely available and can cost 30–50% less than OEM (original equipment manufacturer) replacements. Quality varies. Look for listings that explicitly state “true HEPA H13” and include activated carbon granules, not just a carbon sheet. Some smart home device reviews highlight air purifier performance differences tied directly to filter quality, knock-off HEPA media often uses looser weaves that fail at the 0.3-micron threshold.
If you’re buying in bulk (common for households with multiple units), confirm the seller’s return policy. Filters have a shelf life of about 2 years when stored in a cool, dry place. After that, the carbon layer can lose effectiveness even if the HEPA media looks intact.
OEM filters typically come in packs of 1, 2, or 4. Third-party options often bundle additional pre-filter sheets or foam inserts. These extras can be handy, but verify they’re compatible with your model’s housing before assuming they’re usable.
Maximizing Filter Performance and Longevity
A few habits can stretch filter life without compromising air quality:
Run the unit on lower speeds during low-activity hours. Sleep mode or speed 1 reduces airflow and particulate load on the filter. Save high speeds for cooking, cleaning, or when windows are open.
Pre-vacuum high-traffic areas. Sweeping or vacuuming floors before running the purifier reduces the amount of dust the filter has to catch. This is especially helpful if you have pets or do woodworking.
Keep the unit elevated. Placing the purifier on a low table or stand (12–18 inches off the floor) reduces intake of heavier particles like sand and pet litter. It also improves circulation in the room.
Avoid placing it near humidity sources. Bathrooms, laundry rooms, and kitchens can introduce moisture that shortens carbon and HEPA life. If you must run a purifier in a damp space, consider a model with a washable pre-filter to handle the extra load.
Clean the exterior intake vents monthly. Dust buildup on the outer grille restricts airflow and makes the motor work harder. Wipe with a dry microfiber cloth or use a soft brush attachment on a vacuum.
Don’t remove the filter to “air it out.” Some users think letting a filter dry will restore performance. It won’t. HEPA fibers trap particles via mechanical and electrostatic capture, once saturated, they’re done.
Running the purifier with a dirty or missing filter can burn out the motor. Replacement motors (if available) often cost more than a new unit, so treat filter changes like you’d treat oil changes on a car, non-negotiable maintenance.
Where to Buy Aroeve Replacement Filters and Cost Considerations
Aroeve filters are sold through Amazon, Walmart, and the manufacturer’s website. Prices range from $15–$25 per OEM filter for single units, with discounts for multi-packs. Subscribe-and-save options on Amazon can drop the per-filter cost to around $13–$18, which makes sense if you’re committed to quarterly changes.
Third-party sellers on Amazon and eBay offer compatible filters for $10–$15 each. Read recent reviews carefully. Some batches have inconsistent quality, users report thin HEPA layers or carbon that smells like chemicals out of the box. Product reviews for home appliances often test third-party filters against OEM versions, and results vary widely by brand.
Avoid listings with vague descriptions like “universal HEPA filter” or “compatible with multiple models.” These are often generic circular filters trimmed to fit, not engineered for Aroeve’s airflow design. Fitment issues lead to air bypass, where unfiltered air sneaks around the edges.
Local big-box stores (Home Depot, Lowe’s) rarely stock Aroeve-specific filters, though they may carry generic options. Measure your existing filter’s diameter and height before attempting a universal fit, most Aroeve filters are 6.5–7 inches in diameter and 8–10 inches tall, but subtle differences matter.
If you’re replacing filters in multiple rooms, buy in bulk but stagger your changes. Swapping all filters on the same schedule creates a spike in cost. Offset changes by 4–6 weeks to smooth out expenses.
Warranty note: Some Aroeve warranties require OEM filters for claims. If your unit is less than a year old and develops a motor issue, using third-party filters might void coverage. Check the fine print or keep one OEM receipt on file.